One group in particular suffers from lack of package management in Windows (as I griped about here): developers. This post will largely be a big howto on how to build Python packages with Fortran/C-extensions (especially Fortran extensions seem problematic on Windows). You’d think that something like that would be clearly explained somewhere. So did I, and I was wrong. So here is my guide to building Python packages with native extensions (both C and Fortran) on Windows.
Installing Python packages
The lack of a compiler means most Windows users can’t do what *nix users do when faced with a package containing some c or fortran extensions:
python setup.py install
Or if it’s publicly available on PyPi for example:
pip install package
pip will download the source, and on any system with a compiler, compile it, then install it. So it becomes necessary to provide pre-built binaries for Windows users who don’t have a compiler. Something which no one offers a concise explanation of… until now that is. If you upload your package to PyPi, once you have followed this guide, even Windows users will be able to do pip install package.
1. Set up a Windows machine
To build Windows binaries you will need access to a Windows machine. If you don’t have a copy of Windows lying around to install in a virtual machine, you can create a free virtual machine on Amazon with Windows Server 2012. Selecting the most basic options will be fine and the machine will be free for atleast a year, at which point you can pay the few dollars per year or register for another free account.
Another note: make sure to use 64-bit Windows (Server 2012 only comes in 64-bit versions).
2. Install 32-bit compilers
Don’t ask me why Microsoft didn’t want to ship the 64-bit compiler together with the 32-bit one… The versions here are final. You cannot use newer compilers. In other words, don’t get Visual Studio 2012 and expect it to work… It’s a simple fact that you need to compile your packages with the same compiler as was used to build Python itself.
Install Visual C++ 2010 Express (for Python3)
Python3.3⁄3.4 is built with 2010 and hence all extensions must be as well.
Google for it, or try this link
Install Visual C++ 2008 Express (for Python2.7)
For building Python2.7, 2008 version is required. Google for “Visual C++ 2008 Express” or try this link
3. Install 64-bit compilers
Why did you do this Microsoft, why?!
Install the Windows SDK for Visual Studio 2010 (for Python 3)
The free Visual C++ 2010 Express compiler does not include 64-bit support. That is what we need the SDK to provide. Google for “Microsoft Windows SDK for Windows 7 and .NET Framework 4” or try this link. You need the Windows 7 SDK even if you are running Windows 8. And make sure it is the version with .NET Framework 4, the one with .NET Framework 3 is for Visual Studio 2008.
Note: if you have C++ 2010 Redistributables installed, you might have to uninstall them first or this install might fail. It might work even if some parts of the installer fails since you only need the compiler bits.
Install the Windows SDK for Visual Studio 2008 for (Python 2.7)
Same story for Visual C++ 2008 Express which is used for Python2.7. Find “Microsoft Windows SDK for Windows 7 and .NET Framework 3.5” or try this link
4. Install Miniconda/Anaconda
Download both the 32-bit and 64 bit versions. Python2 or Python3 versions do not matter as we will be using conda environments, but you do need both 32-bit and 64-bit versions! During the installation procedure, I recommend you select the following:
- Install for current user only (this is the default)
- Install into: Users\YOURNAME\Anaconda and Users\YOURNAME\Anaconda-64 respectively
- Do NOT modify the PATH, this will be done explicitly in the build script
- Do NOT make it the default Python, we need to be able to switch easily
5. Create the environments
Do this for both the 32-bit and 64-bit versions.
Open a command line window and navigate to Users\YOURNAME\Anaconda\Scripts (and same for Anaconda-64 later) (Protip: use the file browser to get to the directory then shift-click somewhere and select ‘open command line here’).
Type the following commands:
conda create -n py3.4 python=3.4 numpy pip mingw

conda create -n py3.3 python=3.3 numpy pip mingw

conda create -n py2.7 python=2.7 numpy pip mingw
Remember to repeat that process for the 64-bit/32-bit version as well!
6. Install git
This has nothing to do with the build process, but I will assume that you want to do git clone at some point. Download it here. In this case you absolutely DO want it to modify your PATH.
Actually building stuff
Believe it or not, but you are actually ready to compile your package. Due to multiple compilers and all that, I have made a bat-file which builds wheels for Python 2.7, 3.3 and 3.4, both for 32-bit and 64-bit:
Edit the information at the top. Now assuming everything was installed in the right place, you should just have to double click the bat-file and have built the wheel files which you can then upload to PyPi.
Building wheels automatically on commits
Having to do this manually is a drag and so I have also come up with a fully automated solution using Jenkins, a continuous integration system which monitors your git-repo and clones, builds new files as changes are committed.
Install Jenkins
Just download the native package from [jenkins-ci.org]().
Configure Jenkins
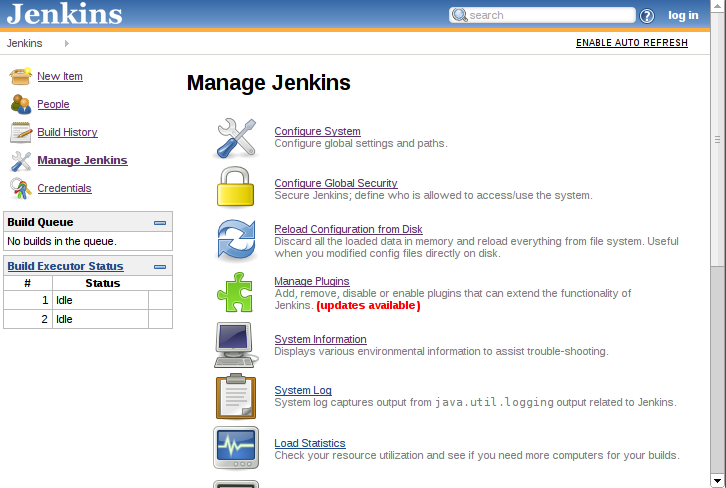
Once Jenkins is installed, it will start itself as a Windows service. Open you web browser and head to [http://localhost:8080](). You then want to go to Manage Jenkins, followed by Manage Plugins:
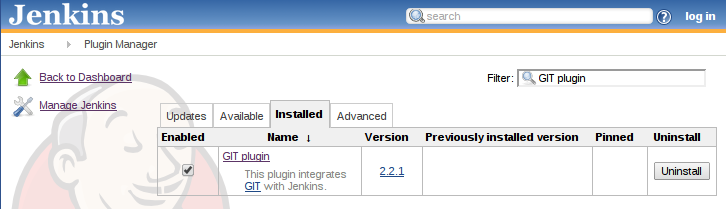
Go to the available tab, and filter on “GIT plugin” (already installed in the screenshot):
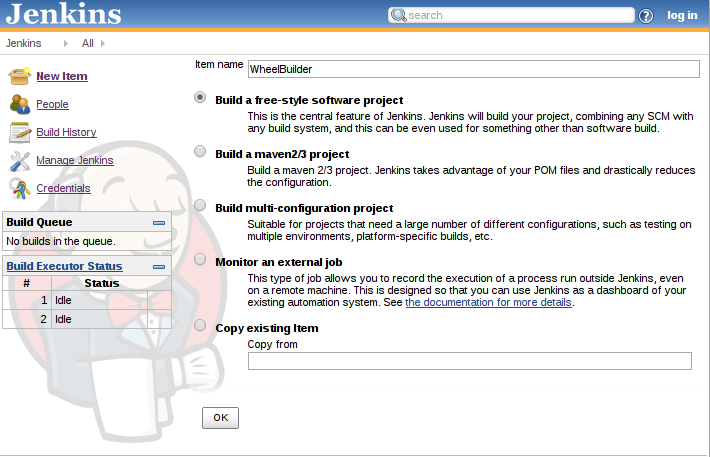
OK, now go back to the top (click Jenkins in upper left) and create a New Item. You want to select “free-style software project” and give it a name:
First thing you need to configure is the git source. Scroll down to Source Code Management, select git, and fill in the repo-address. If you input a public GitHub address you don’t need any credentials:

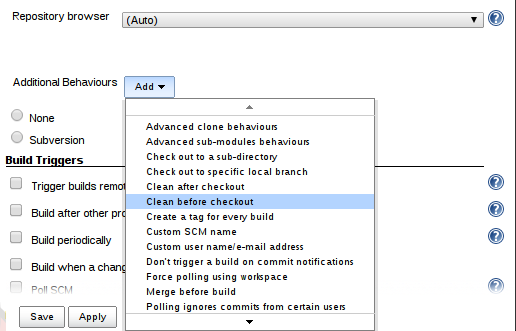
I also recommend you add one Additional behaviour: Clean before checkout to guarantee that builds do not affect each other:
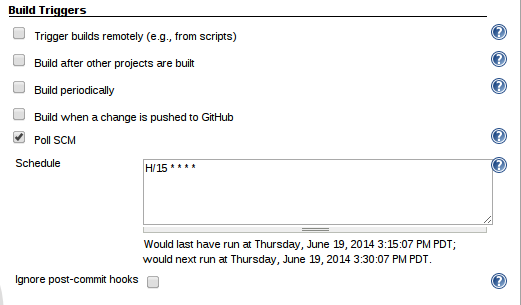
Next you can setup the automatic behaviour. The easiest way is to have Jenkins poll GitHub every X minutes and check if there’s a change. Here I have configured Jenkins to check every 15 minutes:
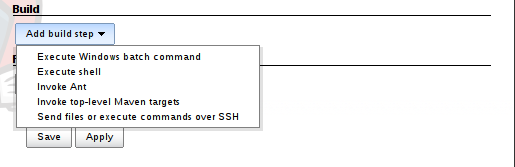
So Jenkins knows what to do when it detects a change, you want to add a Build step, specifically Execute a Windows batch file:
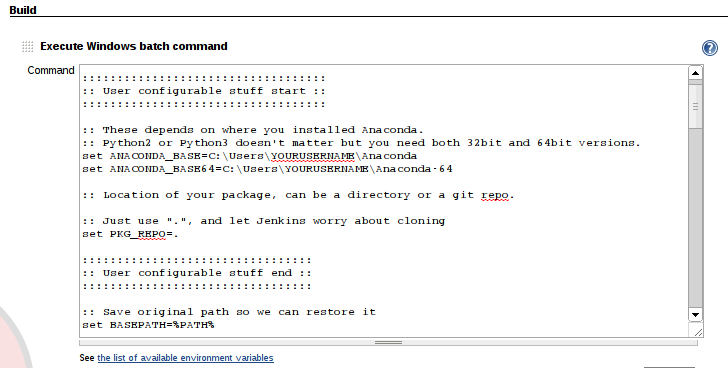
In the box, just copy paste the batch file I included above. Fill in the paths to your Anaconda installs and set the repo to:
set PKG_REPO=.
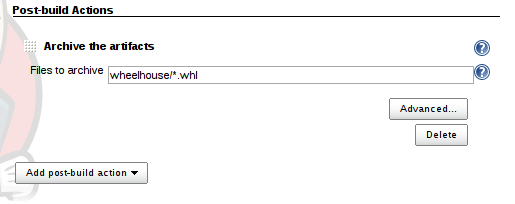
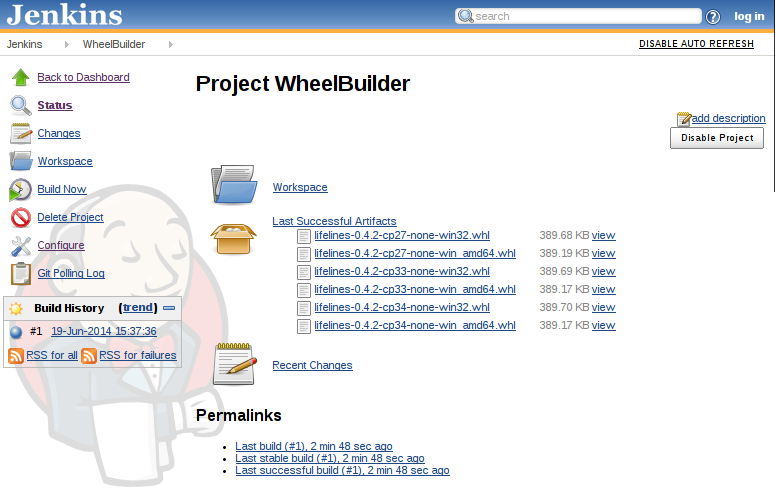
Jenkins will handle the cloning and simply execute the script in the correct directory. As a final configuration step, tell Jenkins to archive build artifacts under Post-Build Actions since you want to be able to download the wheel files:
If you don’t upload wheels to PyPi, then you can install wheels with pip from anywhere with:
pip install --no-index -f http://your.site/wheeldir/ yourpackage
Enjoy your build machine
Now you’re all done. You can manually trigger builds in the left menu. Each build will have links for you to download the wheelfiles and the job’s main page will always display the links to the latest artifacts.
There are so many plugins and options available for Jenkins so play around if you want even more stuff. Some things you can do include:
- Automatically uploading artifacts to an FTP/SSH-server.
- Sending E-mail notifications on success/failures.
- Build only specific branches/tags.
- Make the server public and tie login to GitHub accounts.
- Add Chuck Norris jokes to your builds