
In Gimp you go to Image in the top menu bar and select Mode followed by Indexed. Now you see a popup where you can select the number of colors for a generated optimum palette.
You’ll have to experiment a little because it will depend on your image.
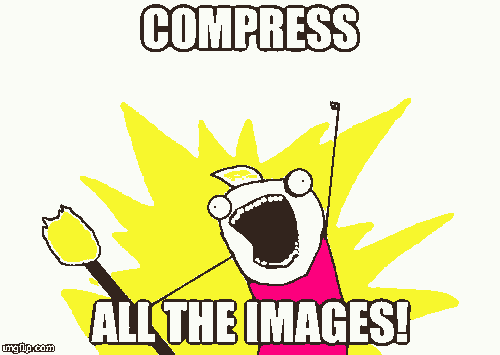
I used this approach to shrink the size of the cover image in the_zopfli post from a 37KB (JPG) to just 15KB (PNG, all PNG sizes listed include Zopfli compression btw).
Straight JPG to PNG conversion: 124KB
First off, I exported the JPG file as a PNG file. This PNG file had a whopping 124KB! Clearly there was some bloat being stored.
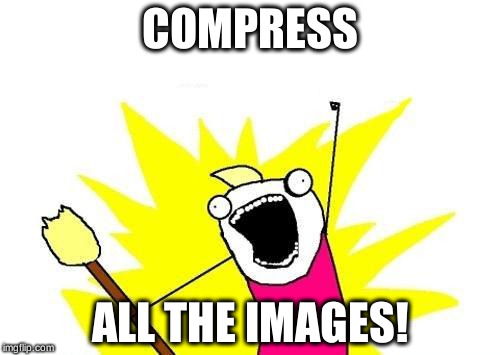
256 colors: 40KB
Reducing from RGB to only 256 colors has no visible effect to my eyes.

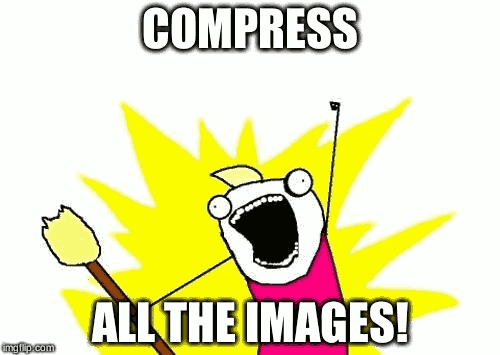
128 colors: 34KB
Still no difference.

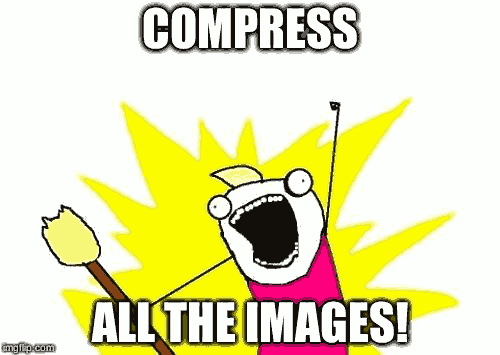
64 colors: 25KB
You can start to see some artifacting in the shadow behind the text.

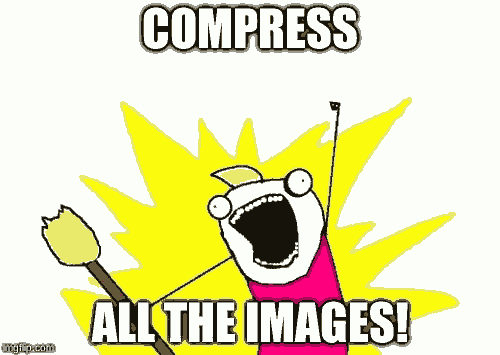
32 colors: 15KB
In my opinion this is the sweet spot. The shadow artifacting is barely noticable but the size is significantly reduced.
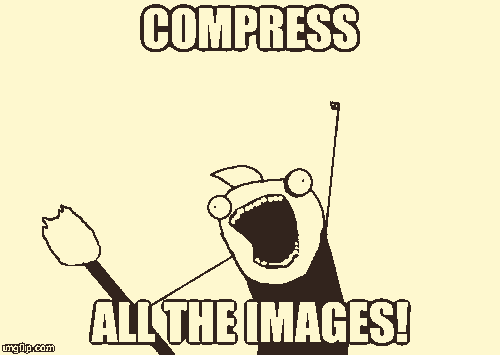
16 colors: 11KB
Clear artifacting in the text shadow and the yellow (fire?) in the background has developed an outline.
8 colors: 7.3KB
The broom has shifted in color from a clear brown to almost grey. Text shadow is just a grey blob at this point. Even clearer outline developed on the yellow background.
4 colors: 4.3KB
Interestingly enough, I think 4 colors looks better than 8 colors. The outline in the background has disappeared because there’s not enough color spectrum to render it. The broom is now black and filled areas tend to get a white separator to the outlines.
2 colors: 2.4KB
Well, at least the silhouette is well defined at this point I guess.
Other posts in the Migrating from Ghost to Hugo series:
- 2016-10-21 — Reduce the size of images even further by reducing number of colors with Gimp
- 2016-08-26 — Compress all the images!
- 2016-07-25 — Migrating from Ghost to Hugo